REVIEW · LAS VEGAS
From Las Vegas: Grand Canyon, Bryce Canyon & Zion 4-Day Tour
Book on GetYourGuide →Operated by VIP Tour Corporation · Bookable on GetYourGuide
Four days of red-rock icons hit fast. This tour is interesting because it strings together Lower Antelope Canyon water time and major park viewpoints with roundtrip Vegas transport and a live English guide (like Ai or Mr. Liu). I like that you’re not just driving—you’re getting help timing viewpoints and understanding what you’re seeing.
One thing to weigh: you spend a lot of hours in the van. It’s part of the deal for packing Zion, Bryce, Arches, Monument Valley, Antelope, Horseshoe Bend, Lake Powell, and the Grand Canyon into only 4 days.
In This Review
- Key things to know before you go
- Why This Four-Day Grand Circle Route Works from Las Vegas
- Day 1: Zion National Park to Bryce Canyon National Park
- Day 2: Bryce, Arches, and Monument Valley (with optional air)
- Day 3: Lower Antelope Canyon, Horseshoe Bend, and Lake Powell
- Day 4: Grand Canyon National Park and the return to Las Vegas
- Price and What You Actually Get for $898
- Hotels, vans, and comfort: simple stays, real roads
- Photo rules and permits that affect your budget
- Tips I’d use: cash, snacks, sun, and a plan for long days
- Who This Tour Fits Best (and who should rethink)
- Should You Book This Vegas to Grand Canyon, Bryce & Zion Tour?
- FAQ
- How long is the tour, and how many nights are included?
- Where do you get picked up in Las Vegas?
- What is included in the $898 per person price?
- What costs are not included?
- Is breakfast included?
- Can I bring a tripod or monopod to Lower Antelope Canyon?
- Are aerial views or helicopter tours included?
- What kind of hotel rooms do I get?
- Is free cancellation available?
Key things to know before you go
- Lower Antelope Canyon has strict photo rules: no tripods or monopods inside.
- Your itinerary is built around big “Grand Circle” landmarks without making you plan tickets or logistics.
- Optional aerial views are available for certain stops, including the Grand Canyon and some bend/dam areas.
- You’re on the road a lot, so motion sickness help is smart.
- You’ll likely stay in basic boutique hotels, clean and comfortable, but not luxury.
- Budget for the extras: Lower Antelope Canyon admission and Navajo Nation permit/service fees are not included.
Why This Four-Day Grand Circle Route Works from Las Vegas
If you’re short on time but want the “greatest hits” of the American Southwest, this is the kind of trip that makes sense. From the start, the plan is straightforward: pick up in Las Vegas, then work your way through the major parks—first Zion and Bryce, then Arches and Monument Valley, then Antelope and Lake Powell, and finally the Grand Canyon.
What I like most is that the route is organized to keep you moving while still giving you actual time at key overlooks. You’re not doing a parking-lot photo sprint at every stop. The day blocks are built around guided time chunks, like 1–2 hours at Zion and Bryce and about 1–2 hours at Arches and Monument Valley.
The other practical win is translation support. One benefit that shows up in real-world operation is that guides such as Ai (and also Mr. Liu) can help keep an English experience smooth for non-English speakers in the group.
Other Grand Canyon tours from Las Vegas we've reviewed
Day 1: Zion National Park to Bryce Canyon National Park
Day 1 is the first “shock of scale” day. You leave Las Vegas in the morning and head to Zion National Park, then continue on to Bryce Canyon National Park. The guided time on this day is about 1–2 hours at each park, with a boutique hotel in town for the night.
Zion tends to reward two things: getting your feet on the ground quickly and choosing viewpoints that match your energy level. In a timed tour format, you’ll want comfortable shoes and a willingness to walk a bit even if the group pace is steady. If you like classic canyon-wall views, this is a strong first introduction.
Then Bryce Canyon comes next. Bryce’s famous rock forms can look almost unreal, especially when you hit viewpoints at the right angle. Since you’ll only have 1–2 hours there, it helps to keep your expectations simple: aim for the major overlooks and enjoy the red-rock textures rather than trying to hike an entire trail system.
That night, you’ll check into a boutique hotel. Reviews-style feedback from similar departures points to rooms that are clean and basic—fine for sleeping and resetting, not the place to plan a vacation-day spa session.
Day 2: Bryce, Arches, and Monument Valley (with optional air)
Day 2 is where the route starts stacking icons. You’ll begin at Bryce Canyon National Park and move on to Arches National Park and then Monument Valley. The guided time is listed as about 1–2 hours in each place, with Monument Valley also offering an optional helicopter or small plane add-on.
Arches is a park that’s made for short, smart walking. With only about 1–2 hours, you’ll want to focus on the main formations and the most scenic pullouts. Even with limited time, the effect is big: you’ll feel like you’ve stepped into a giant rock sculpture garden.
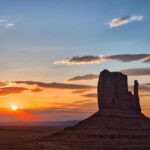
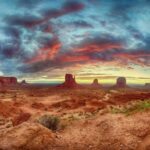
Then comes Monument Valley, which changes the mood fast. This is one of those spots where the horizon matters. You get about 1–2 hours there, and the option for aerial views can be tempting if you want a top-down read of the valley shapes. If you tend to get motion sickness in vehicles, just remember that aerial options are optional—you can keep it simple and stay ground-focused.
That said, the best reason to include Monument Valley in a short tour is how different it feels compared to the earlier stops. It’s not the same canyon-vibe as Zion or Bryce. It’s more open, more horizon, more classic Southwestern film set energy.
Night two is another boutique hotel in town, again geared toward convenience rather than luxury.
Day 3: Lower Antelope Canyon, Horseshoe Bend, and Lake Powell

Day 3 is your “wow, this is why I booked” day. It mixes water-based experiences, famous rock shapes, and a bend-in-the-river moment.
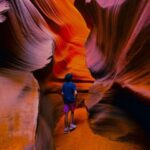
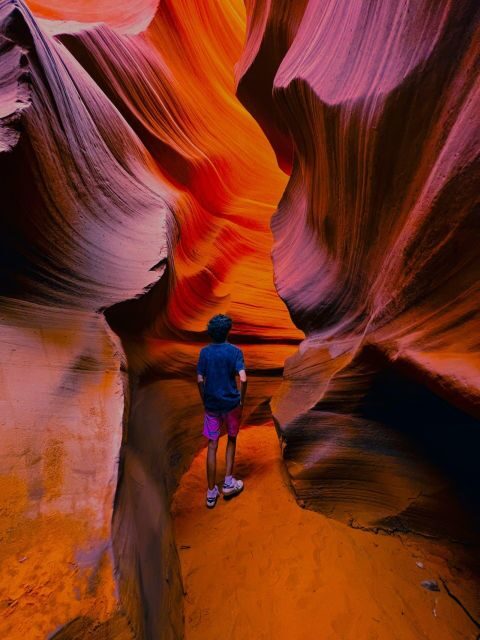
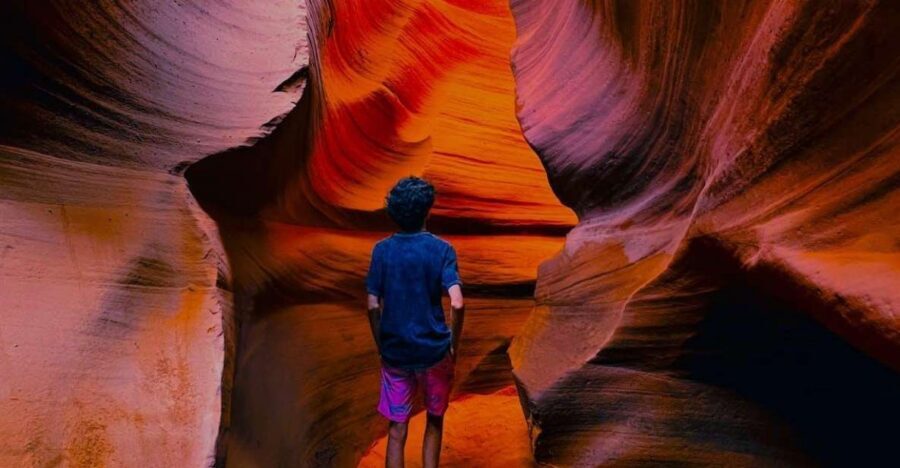
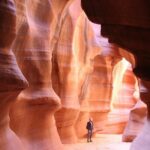
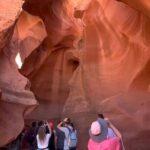
You start with Lower Antelope Canyon. You’ll have about 70 minutes there. Two big practical notes matter here:
1) Tripods or monopods are not allowed in the canyon.
2) The best camera plan is to bring a handheld option and be ready to move at canyon pace.
Lower Antelope Canyon works because the light and rock texture do the heavy lifting. You’ll want to protect your hands and face from sun exposure after the tour too, since you’ll likely spend time outside before/after the canyon. For this day, I’d treat water and sun protection as non-negotiables: bottle water is included, but you should still plan to carry extra.
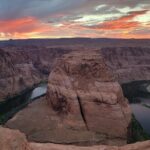
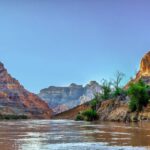
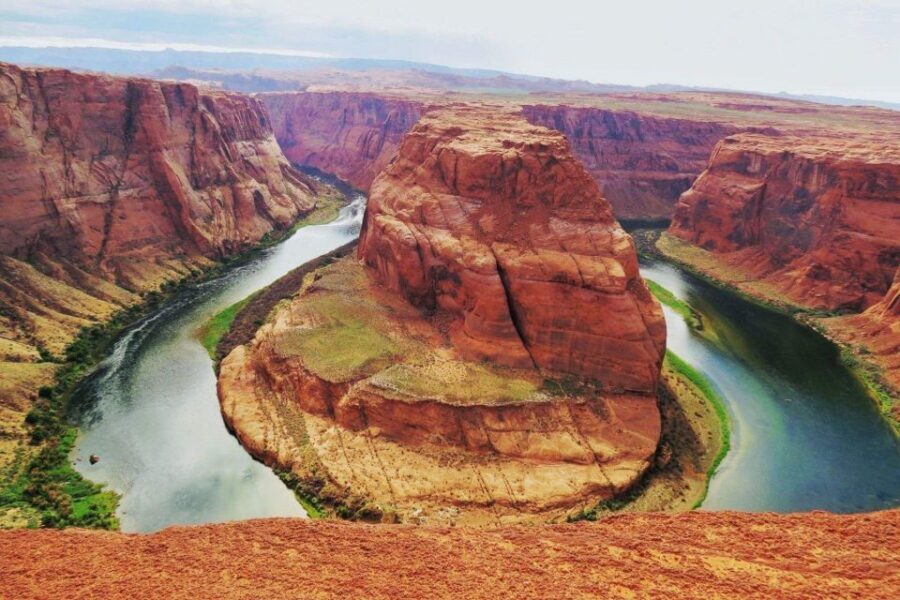
Next up: Horseshoe Bend. You get about 1 hour for this viewpoint, which is a sweet time window for photos plus a slow look without rushing the whole visit. If you’re curious about what the bend looks like from above, there are optional aerial views listed for Horseshoe Bend.
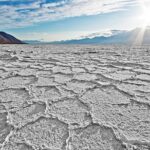
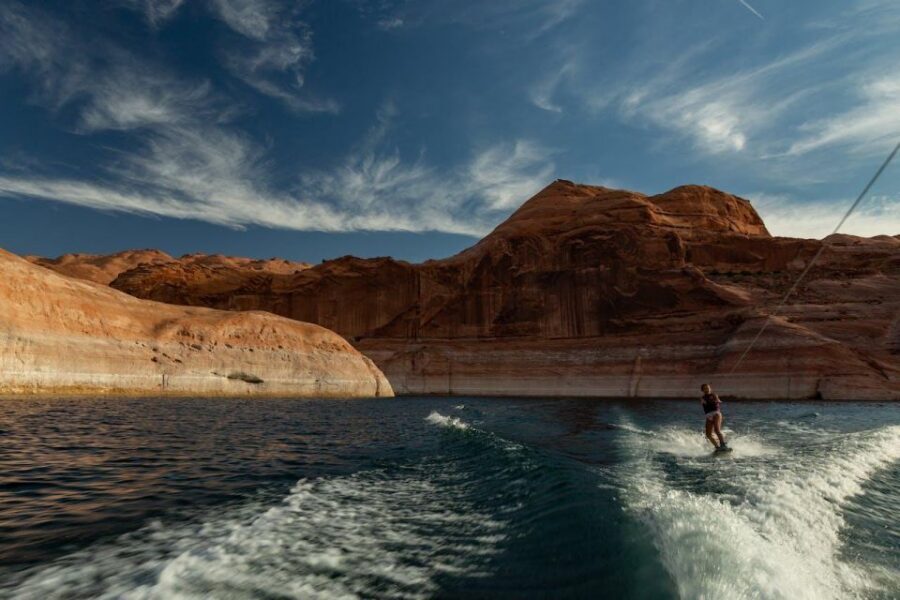
Then you move to Lake Powell with about 30 minutes of guided time. Lake Powell brings a different feel—wider, waterier, and good for photos where you want a break from pure red rock.
This is also where the itinerary lists optional water activities like a boat tour with options such as kayaking, motorboat, or yacht-style outings. You’ll be choosing based on what sounds fun that day and what fits your energy, because this is still a long-travel day.
One extra heads-up from real-world experience: you may cross areas where time gets weird. A practical example is that smart watches can change time while you’re traveling through Navajo land because the region observes its own time rules.
Day 4: Grand Canyon National Park and the return to Las Vegas
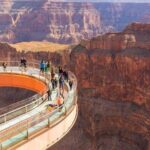
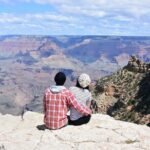
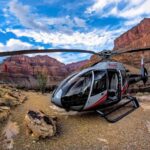
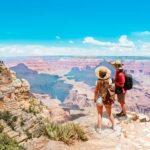
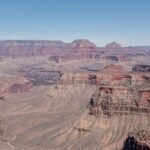
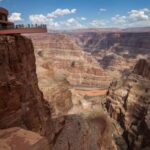
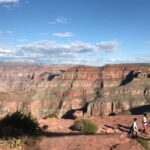
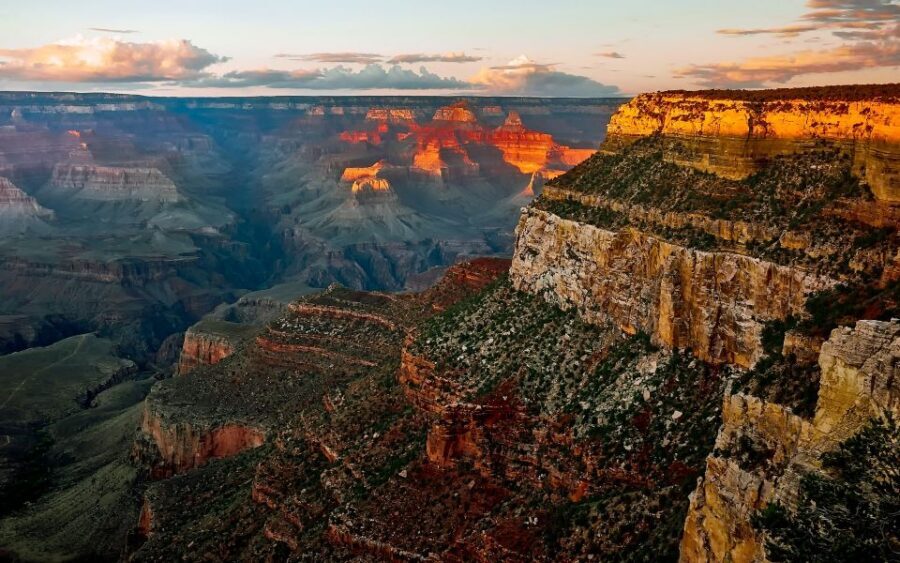
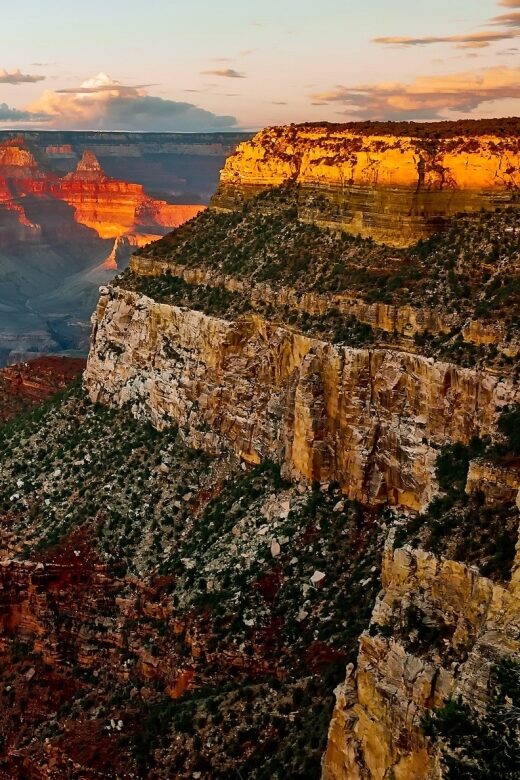
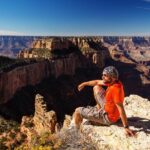
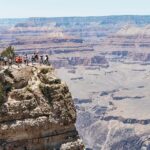
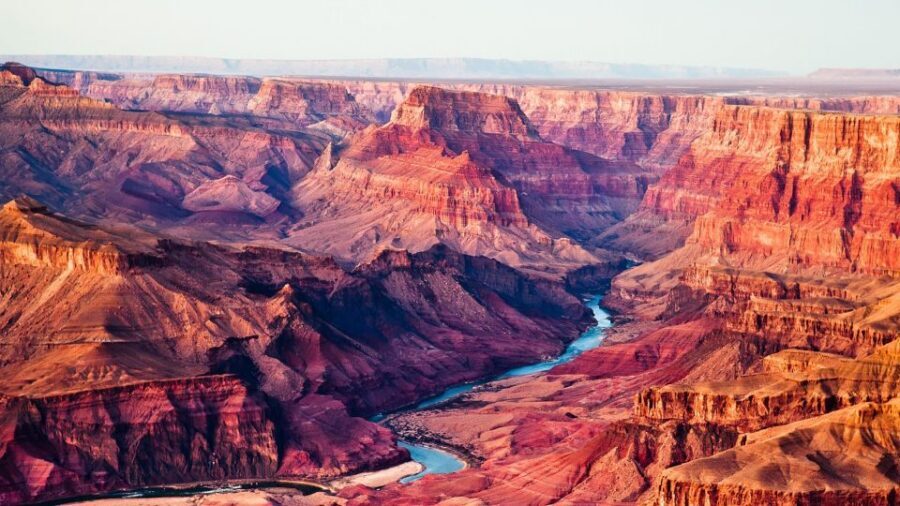
Day 4 is Grand Canyon day, and it’s built as a finish strong enough to justify the whole trip. You’ll go to Grand Canyon National Park for about 2–3 hours, with an optional Grand Canyon helicopter tour listed at around 0.5 hours.
With only a few hours, you’ll get a tour-friendly approach: focus on one of the main South Rim viewpoints and absorb the scale. This is not a day for “I’ll definitely hike all day” thinking. It’s a day to pick your best angles and enjoy the layered geology.
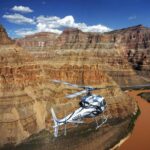
If you’re deciding between helicopter or not, consider what you want from the photo set. The optional aerial time is helpful when you want a different perspective of the canyon’s depth and layout without spending a full day hiking.
After the Grand Canyon stop, the itinerary ends and you’re dropped off at Las Vegas pick-up locations. That drop-off arrangement matters because it reduces the hassle of figuring out your own return transit late in the day.
Other multi-day Grand Canyon tours we've reviewed


Price and What You Actually Get for $898
At $898 per person for a 4-day tour, this package sits in the “value if you want a lot packed in” category. You’re paying for more than the parks—you’re paying for the logistics that usually chew up vacation time: roundtrip transportation from Las Vegas, professional guiding, and 3 nights of lodging.
What’s included:
- Round trip transportation from Las Vegas
- Professional tourism vehicle and commercial vehicle insurance
- 3-night accommodation with breakfast provided at some hotels
- Professional tour guide service
- Bottle water
The not-included costs are important to budget early:
- Navajo Nation permit and service fee
- Lower Antelope Canyon admission ticket ($95)
That means your final spend won’t be only the headline price. If you’re the kind of traveler who budgets carefully, write those items down before you commit so you don’t feel surprised later.
Is it worth it? If you want a guided route that hits Zion, Bryce, Arches, Monument Valley, Antelope, Horseshoe Bend, Lake Powell, and the Grand Canyon without piecing everything together yourself, the time saved is real. If you prefer a slower trip where you can linger for hours at one park, you might find this pacing heavy.
Hotels, vans, and comfort: simple stays, real roads
The tour uses boutique hotels for three nights. Based on practical feedback patterns from similar departures, these rooms tend to be clean and comfortable, but not high-end. Think: solid sleep after a big day, not a resort experience.
The other comfort issue is the road itself. The itinerary involves long driving segments, and some groups may ride in a mini van. On curvy roads, it can feel rocky. If you’re prone to motion sickness, bring your own strategy—some travelers use things like sea-bands or Dramamine.
Also pay attention to the luggage guidance: due to vehicle capacity, it’s recommended you bring no more than 2 pieces of luggage per guest. If you travel with more, you might end up stressed about where everything goes.
Finally, room setup is straightforward: you get 1 room per order, with 2 double beds. If you need more rooms for your group (or you’re traveling with more than 4 people), you’ll need a second booking for additional rooms.
Photo rules and permits that affect your budget

This tour includes some of the most camera-friendly stops in the Southwest, but the rules aren’t all the same.
The biggest “don’t mess around” rule: no tripods or monopods in Antelope Canyon. That changes how you shoot. You may want a compact handheld tripod alternative or just plan to lean your camera on a ledge or use your phone/camera’s burst mode.
On permits and tickets, don’t rely on the tour price alone. Lower Antelope Canyon admission is listed as $95, and there’s also a Navajo Nation permit and service fee not included. These are the kinds of costs that can make or break whether this tour feels like a deal for your budget.
For context, Antelope Canyon is operated under specific local requirements, so those extra fees are part of how the canyon experiences are run. If you’re the type who keeps your spending tight, set aside those amounts early.
Tips I’d use: cash, snacks, sun, and a plan for long days
A few practical habits make this kind of tour feel smoother:
- Bring sunscreen and a sun hat, especially for Antelope Canyon and canyon rim viewpoints.
- Bring comfortable sports shoes. If you can handle sidewalks and short walks, you’ll be fine.
- Bring a camera-ready setup that works without a tripod for Antelope.
- Bring snacks and plan for long stretches between stops. The tour includes bottle water, but you may want more.
- Keep some cash on hand, which can be useful for optional add-ons or small purchases during the day.
One more mental tip: this trip is “greatest hits.” You won’t be able to treat every stop like a standalone day trip. Instead, treat each stop like a chapter: quick context, best viewpoint, then move on.
And if you’re wearing a smart watch or phone that auto-updates time, don’t be alarmed if time shifts while you’re crossing areas with different rules (Navajo land is one example noted from real travel).
Who This Tour Fits Best (and who should rethink)
This is a good fit if you want:
- A guided, high-coverage route from Las Vegas
- Major national park highlights with minimal planning stress
- The option for optional aerial views at certain stops
- A group atmosphere where someone else handles the driving
It may be less ideal if you:
- Want a slow vacation with long free time at only one park
- Are sensitive to bumpy rides and long travel hours
- Need mobility accommodations. The tour is not suitable for people with mobility impairments, based on the tour’s own guidance.
If you’re traveling as a couple or small group who wants to see a lot in a short time, this hits the sweet spot. If you’re traveling with very specific hiking plans, you might find the guided time blocks too tight.
Should You Book This Vegas to Grand Canyon, Bryce & Zion Tour?
If your priority is maximum iconic scenery with a guide and transportation already handled, I’d say this is a strong “yes.” The route connects the parks that most people dream about—Zion, Bryce, Arches, Monument Valley, Lower Antelope Canyon, Horseshoe Bend, Lake Powell, and Grand Canyon—with guided time blocks that keep it from turning into pure driving.
Book it if you can handle long van days, you’re ready for basic boutique lodging, and you’re comfortable budgeting for the Antelope Canyon admission plus Navajo permit/service fees. Also, get your photo plan ready for the tripod rule in Antelope.
Skip or compare if you want lots of downtime, need mobility-friendly touring, or you’re the type who wants to spend half a day hiking rather than rotating viewpoints. In that case, you might feel rushed.
If you tell me your travel month, whether you get motion sickness, and your photo style (phone vs camera), I can help you judge whether this pace will feel fun or fatiguing for you.
FAQ
How long is the tour, and how many nights are included?
The tour duration is 4 days and includes 3 nights of accommodation.
Where do you get picked up in Las Vegas?
Pickup is included at 7:30 AM from Resort World Hotel (Main Hilton Entrance), 7:45 AM at Horseshoe Casino Las Vegas (North Door – Flamingo Rd), and 8:00 AM at New York New York Hotel & Casino (Rideshare Pickup Area).
What is included in the $898 per person price?
The price includes round trip transportation from Las Vegas, a professional tour guide service, professional vehicle insurance, 3-night lodging (with breakfast provided at some hotels), and bottle water.
What costs are not included?
You’ll need to budget for the Navajo Nation permit and service fee, and the Lower Antelope Canyon admission ticket ($95).
Is breakfast included?
Breakfast is provided at some hotels, but it’s not guaranteed for every hotel stop.
Can I bring a tripod or monopod to Lower Antelope Canyon?
No. Tripods or monopods are not allowed in Lower Antelope Canyon.
Are aerial views or helicopter tours included?
Aerial views and helicopter options are optional. The itinerary lists optional aerial views in the route, an optional helicopter or small plane over Monument Valley, and an optional Grand Canyon helicopter tour.
What kind of hotel rooms do I get?
You receive 1 room per order with 2 double beds. If you need additional rooms for more people (or more than 4 people), you’ll need to book a second tour.
Is free cancellation available?
Yes. You can cancel up to 7 days in advance for a full refund.